
Before installing a new thermostat, assess your heating system and address heating controls repair issues. Choose a model suited to climate, system type, and habits, with features like learning, programming, occupancy sensors, and repair capabilities. Install centrally, set profiles for daily routines, program seasonal temperature settings, calibrate for accuracy, and integrate with smart home systems for voice control and optimization. Regularly review and adjust settings for optimal energy efficiency.
Learn how to program a new thermostat for optimal comfort and energy savings. This step-by-step guide covers everything from assessing your current heating system to integrating smart home systems. Discover the best thermostat for your needs, install it effortlessly, and set personalized temperature settings. Plus, learn to test and calibrate for peak performance. Master these simple tasks and enjoy a cozy, efficient home all year round, ensuring hassle-free heating controls repair.
- Assess Your Current Heating System
- Choose the Right Thermostat for Your Needs
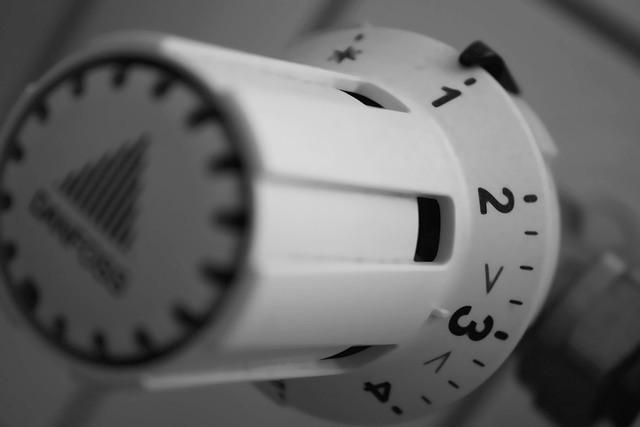
- Install and Set Up the Thermostat
- Program Daily and Seasonal Temperature Settings
- Test and Calibrate for Optimal Performance
- Integrate with Smart Home Systems (Optional)
Assess Your Current Heating System

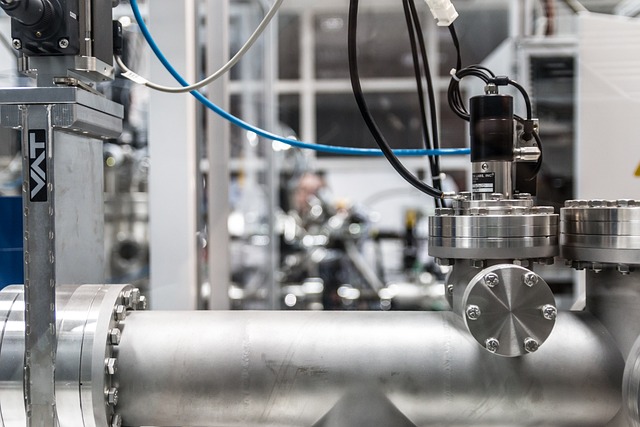
Before programming your new thermostat, it’s crucial to assess your current heating system. This involves understanding the type of heater you have – whether it’s a furnace, heat pump, or another system – and its specific features. For instance, a heat pump might require different settings than a traditional furnace, especially when considering energy efficiency modes. Additionally, check for any existing heating controls repair issues that could impact thermostat functionality.
Knowing your system’s capabilities allows you to set the thermostat with optimal temperature settings. A common practice is to program the thermostat slightly below your desired comfort level during cold months, and above during warmer periods. This helps in energy conservation without compromising on comfort. Remember, a well-calibrated thermostat, backed by a durable battery (for consistent performance), can significantly enhance indoor comfort while reducing heating costs, making it an essential upgrade for any smart home.
Choose the Right Thermostat for Your Needs

When it comes to achieving optimal comfort in your home, selecting the right thermostat is a crucial step. Different thermostats cater to various needs and preferences, from simple mechanical models to advanced digital ones. Consider your climate, heating system type, and personal habits when making a choice. For instance, if you reside in an area with extreme temperatures, a smart thermostat with learning capabilities can adapt to your routine and adjust settings accordingly, ensuring energy efficiency and comfort.
Choosing the ideal thermostat involves understanding its features and functionality. Some models offer advanced heating controls repair options, such as programming different temperature settings for various times of the day or week. Others may have built-in sensors that detect occupancy and adjust heat levels automatically, preventing unnecessary energy usage. A malfunctioning thermostat sensor can disrupt your comfort, so selecting a reliable model with potential fix heat pump defroster features is essential for maintaining a comfortable indoor environment.
Install and Set Up the Thermostat

To start programming your new thermostat for optimal comfort, the first step is to install and set up the device correctly. Begin by mounting the thermostat in a central location, easily accessible for adjustments. Ensure it’s placed away from direct sunlight or drafty areas that could skew temperature readings. Once installed, power on the thermostat and follow the setup instructions provided by the manufacturer. This typically involves creating user profiles for different days of the week and setting desired temperatures accordingly.
During setup, you may also need to connect the thermostat to your heating controls system, which could involve pairing it with a boiler repair or integrating a radiator bleed kit if necessary. For instance, many modern thermostats can learn your preferences over time, automatically adjusting settings for energy-efficient comfort. If you have a humidifier repair near me as part of your home’s system, consider incorporating it into the setup for year-round optimal comfort.
Program Daily and Seasonal Temperature Settings
To ensure optimal comfort year-round, programming daily and seasonal temperature settings on your new thermostat is a must. Start by understanding your location’s climate patterns. During winter, set the thermostat to a slightly higher temperature (e.g., 20°C) during the day when you’re usually home and lower it (e.g., 16°C) while you sleep or are away. In summer, reverse this; keep the house cooler during peak hours and raise the setting when you’re away to save energy.
Create a thermostat compatibility checklist to ensure your new thermostat is set up correctly for your system. This involves matching the thermostat’s capabilities with your heating and cooling equipment. For instance, if you have a water heater thermostat replacement scheduled, make sure your new thermostat can control both indoor temperature and hot water supply efficiently. Regularly review and adjust these settings based on seasonal changes to maintain energy efficiency and comfort throughout the year.
Test and Calibrate for Optimal Performance

After installing your new thermostat, it’s crucial to test and calibrate it for optimal performance. Start by ensuring the heating controls are set to “auto” mode, allowing the thermostat to learn and adjust based on your home’s temperature variations. Observe the thermostat’s behavior over a few days, checking that it turns the heating on and off at appropriate times. This ensures the system responds accurately to changes in ambient temperature.
During this period, keep an eye on your boiler pressure (if applicable) and make sure it stays within the recommended range. Adjust the thermostat’s temperature setting as needed, typically aiming for a comfortable 20-22°C (68-72°F). Regular calibration will help your new thermostat provide precise temperature control, fixing any central heating system issues related to boiler pressure problems or inaccurate readings.
Integrate with Smart Home Systems (Optional)
Integrating your new thermostat with a smart home system can elevate your comfort to a whole new level. Many modern thermostats are designed to work seamlessly with popular smart home platforms like Google Home, Alexa, or Apple HomeKit. This optional step allows you to control your heating and cooling from anywhere using just your voice. For instance, say goodbye to rushing home to adjust the temperature during chilly evenings or sweltering days. Simply give a command, and your thermostat will oblige.
This integration also enables automatic scheduling based on your habits and preferences, ensuring optimal comfort without any additional effort. Moreover, some smart thermostats can even predict and adapt to changes in weather patterns, optimizing energy usage and potentially saving you money on heating controls repair or dishwasher heating element replacement scenarios, commonly caused by incorrect thermostat settings or a thermostat sensor malfunction.
Programming a new thermostat is a straightforward process that can significantly enhance your home’s comfort and energy efficiency. By following these steps, from assessing your heating system to integrating smart home systems, you can enjoy precise temperature control and reduce energy costs. Remember, proper calibration and seasonal adjustments are key to optimal performance, ensuring your home stays comfortably regulated year-round. With the right thermostat and some simple programming, you’ll be in control of your heating like never before!